
Choosing the right Plumbing Pipe Cutter can decide whether a repair feels controlled or frustrating. A neat cut supports a reliable connection, while a crushed edge may create leaks, weak joints, or wasted material. The correct tool depends on pipe type, diameter, wall thickness, access, and cutting frequency.
Richard Trethewey, a respected plumbing and heating expert from This Old House, offers a practical reminder: “Use the right tool for the right job.” That principle applies directly to pipe cutting. Copper often suits a rotary cutter, while plastic pipe may require a ratcheting cutter or fine-tooth saw. Stainless steel and multilayer pipe demand compatible blades and careful handling. Do not assume one cutter fits every project.
Small details matter. Check the cutter’s maximum capacity before buying. Inspect the wheel for sharpness and smooth rotation. A comfortable handle helps when working beneath a sink or inside a crowded cabinet. Deburring is also essential after cutting, especially with copper and metal pipe. Sharp internal edges can damage seals or restrict water flow.
Experience teaches another lesson: specifications do not tell the whole story. A compact cutter may reach tight spaces but require more turns. A larger model may cut faster but feel awkward near walls. I have found that beginners sometimes focus only on price. That choice can become expensive later. This guide compares cutter designs, materials, adjustment systems, and real working conditions. It also considers safety, maintenance, and the mistakes that even careful users can make. Expect practical guidance, not a perfect answer for every toolbox.
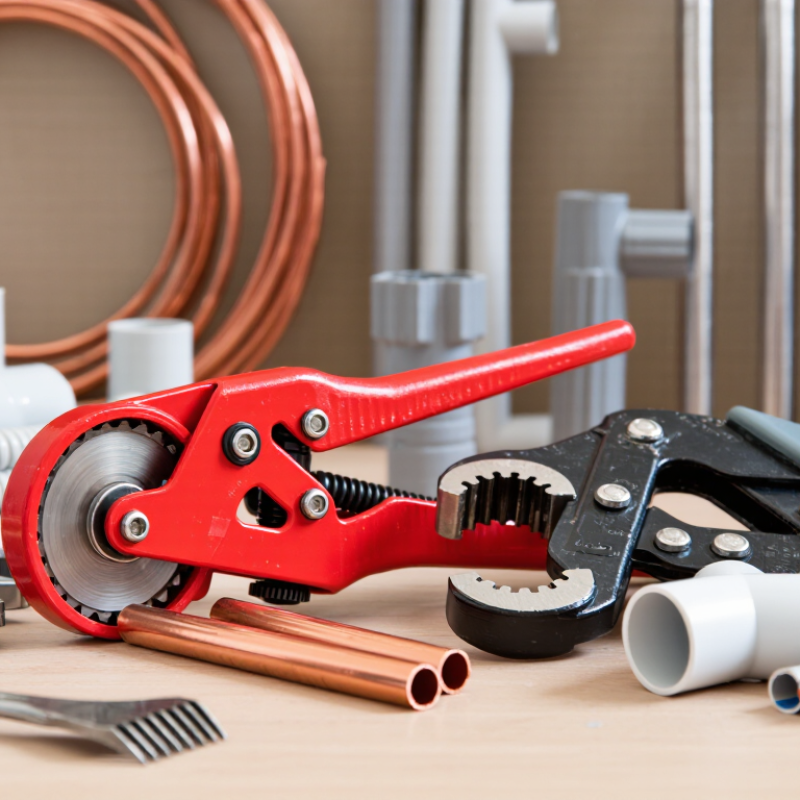
Choosing a plumbing pipe cutter starts with identifying the pipe material, diameter, and working space. A rotary wheel cutter suits copper, brass, and thin-wall metal pipes. It circles the pipe and makes a clean, controlled cut. This tool works well beneath sinks, where movement is limited. However, excessive pressure can flatten soft tubing.
For PVC and other plastic pipes, a ratcheting cutter is usually more practical. Its curved blade closes gradually and creates a fast, square cut. Use it only within the cutter’s stated diameter range. Large or rigid plastic pipe may need a wheel-style cutter or a fine-tooth saw. A multi-layer pipe cutter handles flexible composite tubing, but the blade must stay sharp.
For steel or thick metal, a heavy-duty rotary cutter or pipe-cutting saw is more suitable. These tools require stronger support and more clearance. I once rushed a copper cut and left a small burr inside the pipe. It later disturbed the fitting seal. That mistake changed my routine: I now deburr every metal edge and check the cut for squareness.
Look for an adjustable guide, comfortable grip, and replaceable cutting wheel. Keep the pipe steady, mark the cutting line clearly, and rotate the tool slowly. Wear eye protection when cutting metal. A cutter that feels powerful is not always the right cutter. The cleanest result often comes from the simplest tool.
Choosing a plumbing pipe cutter starts with identifying the pipe material and its actual outside diameter. Nominal size can mislead. Measure the pipe with calipers or a tape measure before selecting a tool. The U.S. EPA’s 7th Drinking Water Infrastructure Needs Survey estimates that American drinking-water systems need about $625 billion in improvements over 20 years. That scale reflects mixed materials, from copper and steel to PVC and newer multilayer tubing.
Copper and thin-wall stainless steel usually need a wheel cutter with adjustable pressure. Tighten gradually. Excess force can flatten the tube and restrict flow. For PVC and CPVC, use a sharp ratcheting cutter sized for the pipe’s diameter. A dull blade may create a slanted cut and stress the fitting. PEX requires a dedicated shear that leaves a square, clean end. It should not crush the tubing.
Large cast-iron or steel pipe often requires a chain-style snap cutter, especially in cramped trenches. Check the tool’s rated range first. A cutter designed for 15–50 mm pipe may not handle 75 mm safely. Deburr copper and steel ends, then inspect the cut under bright light. Small ridges matter. In field work, I have found that rushing this inspection causes more leaks than choosing the wrong tool. That is worth questioning. Manufacturers’ instructions and applicable ASTM or ASME requirements should control when material, wall thickness, or temperature is uncertain.
How to Choose a Plumbing Pipe Cutter?
Choosing a pipe cutter depends on its cutting mechanism, handle design, and blade quality. A rotary cutter works well on copper and thin metal pipes. It makes a clean, controlled cut around the pipe. A ratcheting cutter needs less wrist movement and suits cramped spaces. Scissor-style cutters are practical for PVC and PEX, especially during repeated cuts. However, some models can crush softer pipe edges if the blade pressure is excessive. Measure the pipe before cutting. A tight fit matters.
Tips: Turn the cutter slowly. Keep the blade square. Check the cut edge for burrs. A rough edge can damage seals or restrict water flow. Test the tool on a spare section first.
Handle comfort is easy to underestimate. A textured, non-slip grip helps when gloves are wet. A longer handle can increase leverage, but it may be awkward inside a cabinet. Look for smooth ratchet action and a release mechanism that does not stick. I once chose a compact cutter for convenience, then found its handle tiring after several cuts. That was a useful mistake.
Blade quality directly affects accuracy and service life. Hardened steel blades usually resist dulling better than soft, poorly finished blades. Inspect the cutting wheel for chips, uneven edges, or loose movement. Replacement blades are valuable because even a strong tool eventually loses sharpness. Do not force a dull cutter. It may deform the pipe and create more repair work.
Choosing a plumbing pipe cutter starts with safety, especially when working in cramped, wet spaces. Look for a comfortable grip, a guarded cutting wheel, and a tightening knob that turns without slipping. The cutter should sit firmly on the pipe, without wobbling as pressure increases. I test the adjustment before cutting because a stiff mechanism can make a rushed hand move suddenly. Wear eye protection, even when the pipe appears clean. Small metal chips travel farther than expected.
Precision matters when fittings must align without force. Choose a tool with a sharp, centered wheel and a frame sized for the pipe diameter. The cut should be square, with no crushed edge or deep spiral mark. After each cut, check the end under bright light and remove the inner burr carefully. A smooth-looking cut can still hide a narrow ridge that restricts water flow. I sometimes recheck measurements after cutting. That extra minute can prevent an expensive correction.
Ease of maintenance affects accuracy over time. Wipe the cutter dry, clear chips from the wheel, and apply suitable lubricant sparingly. Follow its capacity and care instructions. Inspect the wheel, axle, and threads for rust, looseness, or uneven wear. Replace a damaged wheel instead of forcing it through thicker material. Do not ignore a rough adjustment. It may signal needed cleaning or repair. I have left tools in a damp toolbox before. That mistake taught me to inspect the cutter before every job.
Choosing the Right Cutter for Your Plumbing Project
A pipe cutter should match the pipe material, diameter, and working space. Copper and thin-wall metal usually need a rotary wheel cutter. PVC and PEX often cut cleaner with a ratcheting shear. Multilayer pipe needs a supported, square cut. Check the cutter’s rated diameter before starting. A loose wheel can crush the pipe edge, while excessive pressure may leave internal ridges.
Tips: Measure twice, then mark the cut clearly. Use a deburring tool on metal pipe. Rotate a wheel cutter gradually instead of forcing it. For plastic, inspect the blade after several cuts. A dull blade can create an angled end. Wear eye protection, even during a small repair.
The U.S. EPA WaterSense program reports that household leaks can waste nearly 10,000 gallons of water annually. A poorly prepared pipe end may contribute to connection failures, although the cutter alone is rarely the only cause. ASPE’s Plumbing Engineering Design Handbook emphasizes proper joint preparation and material compatibility. In practice, I have sometimes chosen a compact cutter for access, then regretted its slower, less controlled cuts. That experience matters. The best tool is not always the fastest one. It is the cutter that leaves a clean, round, usable end in the actual space available. Always follow the pipe manufacturer’s installation instructions and test the completed joint carefully.
Choose a cutter according to the pipe material. The guide rating uses a 0–3 scale: 0 = generally unsuitable, 3 = commonly suitable.
Wheel cutters are commonly used for copper and thin-wall metal tubing, ratcheting plastic cutters are designed for PEX and PVC, and heavy-duty chain or ratchet cutters are appropriate for larger or heavier steel pipes. Always check the cutter's capacity and the pipe manufacturer's instructions before cutting.
Match the cutter to the pipe material. Use a rotary wheel cutter for copper, brass, and thin-wall metal. Use a ratcheting cutter for PVC or similar plastic. Composite tubing needs a supported multilayer cutter. Steel may require a heavy-duty rotary cutter or cutting saw.
Check the pipe diameter and the cutter’s rated range. Look for an adjustable guide and a replaceable blade. A comfortable, non-slip handle helps with wet gloves. The cutter must fit the available working space.
A compact rotary cutter often works well beneath sinks. It needs little movement around the pipe. A ratcheting cutter can also suit cramped areas. However, a short handle may become tiring after several cuts.
Apply gentle pressure and rotate the tool slowly. Excessive force can flatten copper or deform plastic. Keep the blade square to the pipe. Check the pipe after every few turns.
Measure the required length twice. Mark a clear cutting line. Keep the pipe steady during cutting. A loose pipe can produce an angled end.
Cutting can leave a sharp inner ridge or rough outer edge. This burr may disturb a fitting seal or restrict water flow. Remove it with a deburring tool. Then inspect the edge by touch and sight.
A hardened blade usually stays sharp longer. Inspect it for chips, uneven edges, or loose movement. Smooth ratchet action reduces hand strain. A long handle adds leverage but may not fit inside a cabinet.
Do not force a dull blade. It can deform the pipe and create extra repair work. Test the cutter on spare material when possible. I once rushed a copper cut and missed a small burr. That mistake changed my routine. Always inspect the finished joint carefully.
Choosing the right Plumbing Pipe Cutter begins with understanding the main types and their intended uses. Compact rotary cutters are useful for clean, controlled cuts in confined spaces, while ratcheting and multi-purpose models can handle larger diameters or tougher materials with less manual effort. The cutter should match both the pipe material and its diameter, since plastic, copper, stainless steel, and other materials require different levels of cutting force and blade durability.
When comparing tools, examine the cutting mechanism, handle design, and blade quality. A smooth adjustment system, comfortable grip, and sharp, replaceable blade can improve precision and reduce fatigue. Safety features such as secure locking, stable pipe support, and controlled movement are also important. Easy cleaning, simple blade replacement, and resistance to corrosion will make maintenance more convenient. By considering the project’s pipe type, size, workspace, cutting frequency, and required accuracy, you can select a reliable Plumbing Pipe Cutter that delivers clean results and efficient performance.
